Those who thrive in a wilderness shelter building situation are an opportunistic breed making use of all equipment, tools and elements of the environment available to them.
Although the idea of constructing a temporary home may seem like a daunting task, the success of your survival depends on the choices you make in the planning stage. With a proper mindset, the right materials and a few sound shelter building techniques, the average person can set themselves up in relative comfort, in a short amount of time.
Understanding the importance of constructing an effective wilderness shelter, tailored to your specific situation, is one of the most important realizations you can make as a survivalist. Establishing a location that offers the comforts of home and keeps you protected from the elements on the short-term basis, is the ultimate goal.
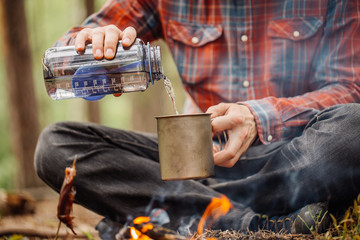
Wilderness Shelter Construction
Source: Pixio
As with the other elements of outdoor survival such as fire making, food and water gathering, shelter building is of utmost importance in dealing with the elements. Considering that North America covers some of the most extreme climates on the planet, the shelters I will focus on will be those used in all four seasons of Canada and United States. Apart from water, shelter building is perhaps the most important tool to consider in an outdoor survival situation.
5 Survival Shelters
The most common shelters which can be constructed to cover virtually every climate situation in this country are: 1) the Quinzhee hut, 2)the Lean-to, 3)the A-frame, 4)the bow bed, and 5) the wiki-up. Seeing as winter is the most crucial time for shelter building due the harsh temperatures, we will begin with the winter shelter, the Quinzhee hut. This shelter is constructed only during the winter months and requires the presence of snow to be completed. A quinzhee hut is a dome-shaped snow shelter which, off hand, looks like an igloo although is easier to build.
1) Quinzhee Hut
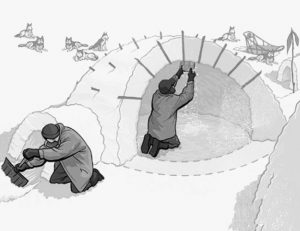
Source: Canadian Wilderness Adventures
First used by the Athabasca Indians, the Quinzhee is a popular and easy to construct winter survival shelter. To build a Quinzhee begin by gathering your survival equipment such as duffel bag and gear piled in a circle with a tarp placed over the top. Backpacks and larger camping equipment are often used for this purpose. Begin packing snow around the mound over top of the tarp and packed down until an estimated 2 feet of snow has been covering the mound. Next, insert 12 inch long sticks into the dome at random locations using two dozen approximately next you should burrow inside the Quinzhee to retrieve the tarp and gear and then excavate the snow inside the mound until you reach base of each stick, this will ensure an even thickness of the dome throughout. Let stand for 2 to 3 hours and then burrow back into the quinzhee and scoop out snow to make room to stretch out, and punch a sizable hold through the ceiling to act as a ventilation hole.
As far as winter shelters go, the Quinzhee is by far the easiest to set-up in a short amount of time. This stereotypical igloo although a formidable structure requires specific snow type as well as some heavy chiselling and block placing. The Quinzhee will preserve heat and warmth and the survivor may also construct a small fire or even use a candle as a heat source, and will be surprised at how well insulated this structure really is.
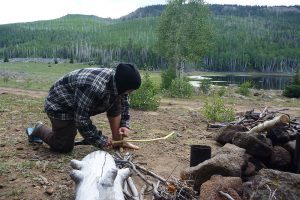
2) Lean-to
Source: Adobe Stock
The lean-to shelter is one of the oldest and most commonly constructed primitive shelters in existence. This type of shelter can be set up quickly and serves as a efficient windbreak however is susceptible to heat loss. To build one, start by fastening a long stiff hardwood pole stretched between two trees. Collect a variety of branches and bows to cover one side of the tree, and continue piling debris, other trees and logs on the same side of your structure.
A lean-to should be built with the prevailing wind direction in mind, as it will serve as a windbreak. The limitation of this shelter is that there is no roof and basically only one wall in which to protect you from the elements. The lean-to should only be construction in the case of short-term stay and in favourable weather conditions.
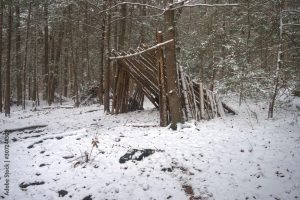
3)Wiki up
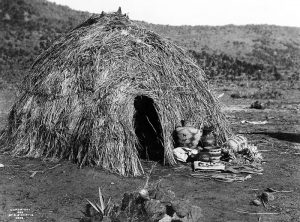
Source: Wikipedia
Originating in the American southwest, the Wiki Up shelter is much like a modified tepee but constructed brush and vegetation. Begin by collecting 3 to 4 dozen log holes approximately 2 to 3 inches in diameter, and some with forks at one end. Start by arranging some of the fork poles to create a tepee like tripod. Begin assembling the remaining poles around your wigwam frame until only a small amount of light shines through.
To finish the wiki up you must gather debris and vegetation or leaves to fill in the spaces between the poles. The vegetation will act like an insulation layer for your shelter keeping the warm air in and the cool air out. This shelter configuration is most often constructed in the spring, summer and fall months where a small fire is not required inside for additional warmth. In the case of high winds or a more mountainous shelter location, additional poles may need to be laid along the outside to support the entire structure.
4) A-frame
This type of shelter is one of the simplest to construct and can be set up in 15 minutes or less. It does serve as great coverage for the rain wind and in some conditions even snow. This shelter type does require a tarp and a rope tied between two trees approximately 5 feet in the air. Stretch your tarp across your guy wire rope and pull down tightly on each end to form a triangle.
The bottom edges of your tarp should be anchored down with a row of rocks or log stretched out to keep the tarp from catching in the wind. The A-frame shelter is moderately more efficient than the lean to where you do have a complete roof structure although both ends of your shelter are open to the elements and more warmth may be retained. Depending on the density of insulation you choose, the leaf structure may actually become waterproof.
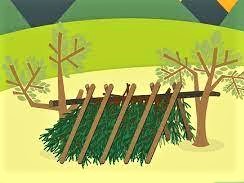
5) Bough bed
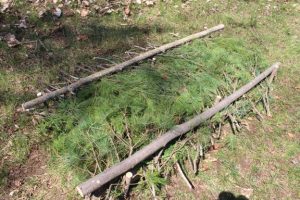
Source: Art of Manliness
This structure is not a shelter on its own, however may be used as a sleeping platform in many of the shelters discussed. The best bough bed is made with softwood bows: hemlock, spruce, pine and fir all make good bedding material. Start by creating your bed frame from two logs approximately 6 feet long, placed side by side about 3 feet apart. Start filling in the space between logs with the softwood branches a few at a time place the branches crisscross and arrange in the most even way possible. Dry leaves and grass will also serve as additional bedding material.
The main goal of the bough bed is to have your body 10 to 12 inches above the cold ground to form an insulation barrier. The thicker your bow mattress is the more insulation you will have; keeping in mind that your bough bed compresses when you lie on it. A 2 foot thick bow mattress will generally compress down to 10 to 12 inches.
Final thoughts

Remember that every survival situation calls for a different response. Should you construct a shelter in one of the designs mentioned, and discover the next morning that it has limitations, you may consider rebuilding and/or relocating altogether. Perhaps your shelter is too large, not waterproof, or simply does not suit the needs of your current situation, you are better to rebuild and relocate in troublesome situation, than to suffer with a substandard shelter.